User guide › Quick start
1. Create your workspace
Sign up at app.bo.ge. The first workspace is created as part of signing up, and you become its owner — the one account that can never be locked out and the only one that can manage the plan.
To add another workspace later, open the switcher at the top-left of the sidebar and choose New workspace. You’ll be asked for a name and an admin password for it.
The free plan covers up to 3 users with no time limit, so you can build the whole thing out before deciding anything about billing. See pricing.
2. Pick your route
Install a template if something close to your business already exists — a CRM, a staffing agency, a restaurant, a property manager. You get entities, fields, views, sample records and automations in one go, then edit whatever doesn’t fit. This is the faster route and the one most people should take.
Start from scratch if your process is unusual enough that you’d spend longer deleting things than building them.
Either way you’re in the same place afterwards, and you can install more apps at any time. Templates and apps both live under Settings → Templates and Settings → Apps — see Templates & apps.
3. Build your first entity
Go to Settings → Database. This is the builder: the list of every entity in the workspace down the middle, and the selected entity’s definition on the right.
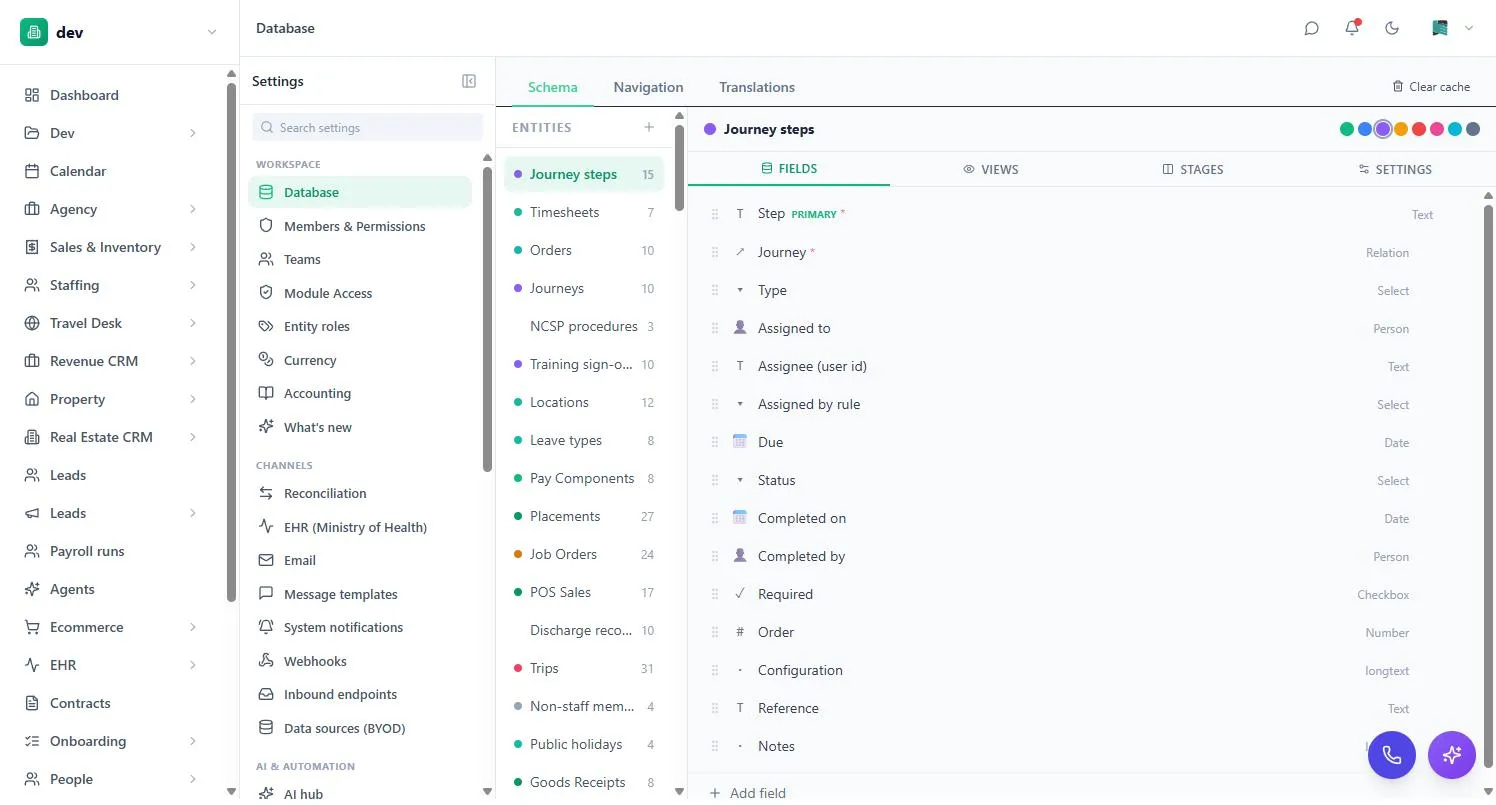
- Add the entityPress + at the top of the Entities column and name it as a plural noun — Customers, not Customer. It’s what will appear in your sidebar.
- Add fieldsOn the Fields tab, use Add field. Give each one a name and a type. Start with the handful you actually need — you can add more later without disturbing existing records.
- Set the primary fieldOne field is the record’s title, shown wherever a record is referenced. Make it something identifying — a name or a number, not a status.
- Check the viewsA table view is created for you. Add a board or calendar view from the Views tab if the entity has a status or a date worth seeing that way.
4. Get your data in
Three ways, depending on where the data is now:
- Type it. Open the entity from the sidebar and use + New record. Fine for tens of records.
- Import a spreadsheet. Use Import in the table toolbar and map your columns to fields. Large files import in the background so you can keep working.
- Receive it automatically. Public forms, inbound endpoints, webhooks and scheduled data sources can all create records without anyone typing. See Integrations & API.
Import twenty rows first and check they landed correctly — especially dates, currencies and any relation fields that have to match existing records by name. Fixing a mapping mistake across twenty rows is much easier than across twenty thousand.
5. Invite your team
Go to Settings → Members & Permissions and invite people by email. They set their own password from the invitation link, so you never handle anyone’s credentials.
New members can’t see anything sensitive by default. Decide two things for each person: which records they can reach (the Access tab) and which apps they can open (Module Access). Both are covered in Permissions & access.
6. Make it work for you
Once the data and the people are in, these are the things worth doing next: